The following tutorial may take a while to download. It has LOTs of pictures!
The issue with swapping Panasonic’s CD/DVD out for a DVD R/W is that
Panasonic makes their CD/DVD drives as a master at the factory. Almost
all other manufacturers make theirs as cable select. Simply swapping
drive for drive will cause your CF-27, CF-28 or CF-29 Toughbook to have
an error upon boot… If it even boots at all.
This is a very easy “How-To!” All the hard work has been done… Figuring
out how to do it! The whole operation can be done in about 30 minutes
with a few simple tools. It is extremely important that you read these
directions several times to familiarize yourself with the entire
operation. Doing this will make things much easier when you are going
through the process! You will need the following items for the swap;
1 - 40 watt soldering iron
About an inch or two of solder
A small Phillips head screwdriver
A replacement slimline DVD R/W.
(I recommend the Sony Optiarc model number AD-5540A)
Possibly a small strand of speaker wire (You’ll see)
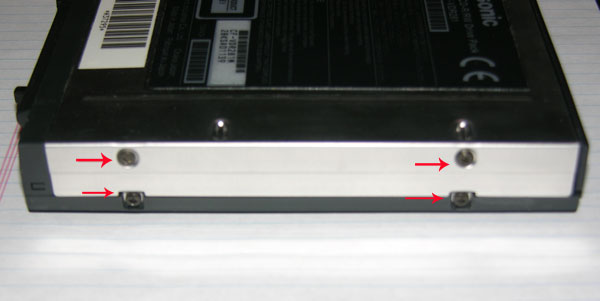
The first thing to be done is to open the case. This is accomplished by removing screws on one side…
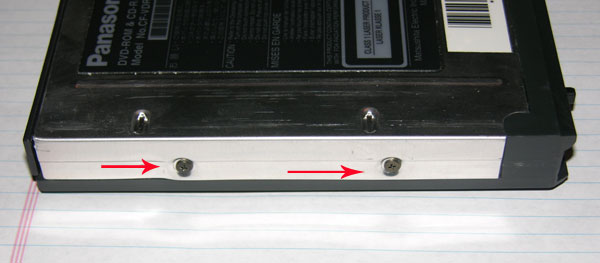
and four screws on the other…
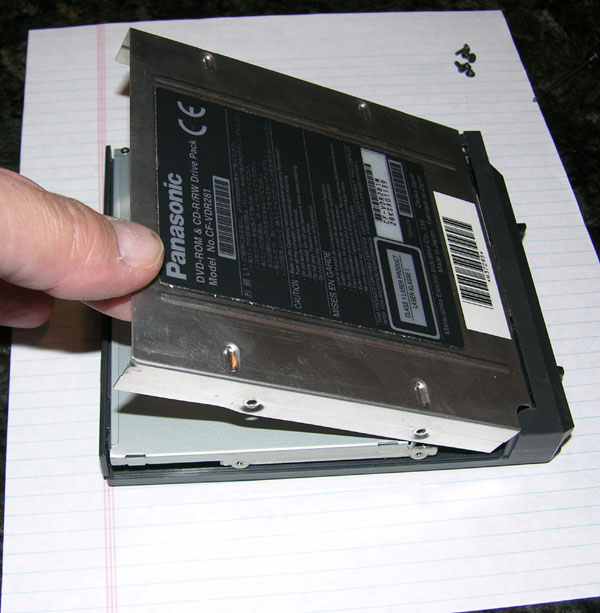
Then carefully pop it open! (below)
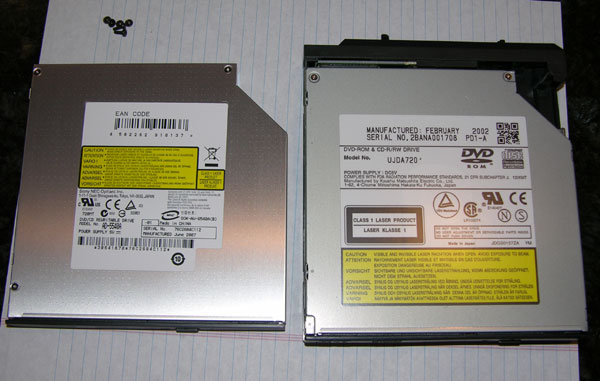
At this point… You can see how easy this will be… Sort of…
Then flip it over and remove the screw shown. This will allow the
CD/DVD module to come out. It will still be attached to the cable but
you can very carefully separate the CD from the case.
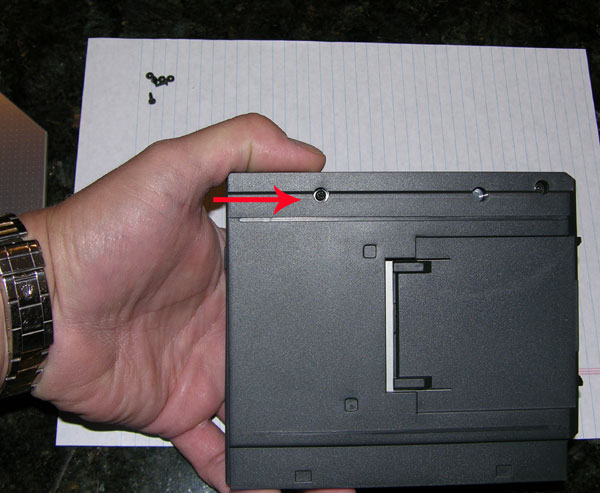
When you remove the CD module you will see this… (below)
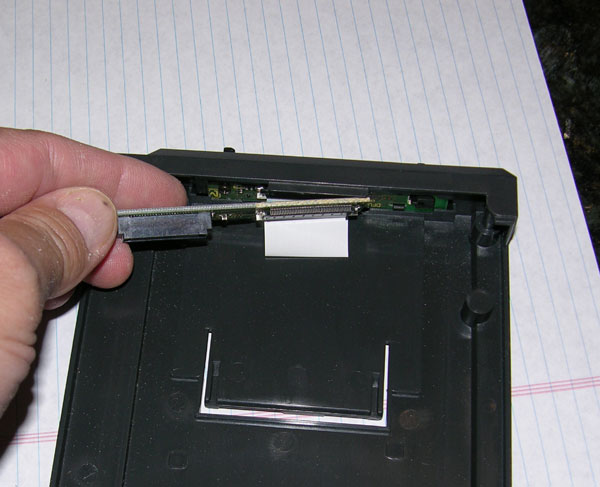
Now we need to remove the ribbon cable and small PC board that attaches
to the back of the CD/DVD. To do this, we need to remove the next
screw… Seen here… (Below)
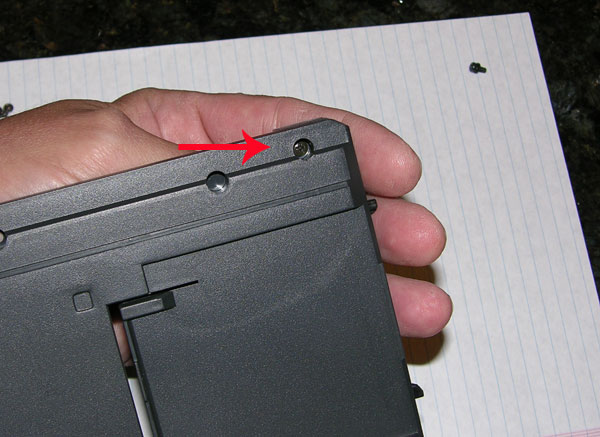
With the screw removed the assembly comes out. (Below)
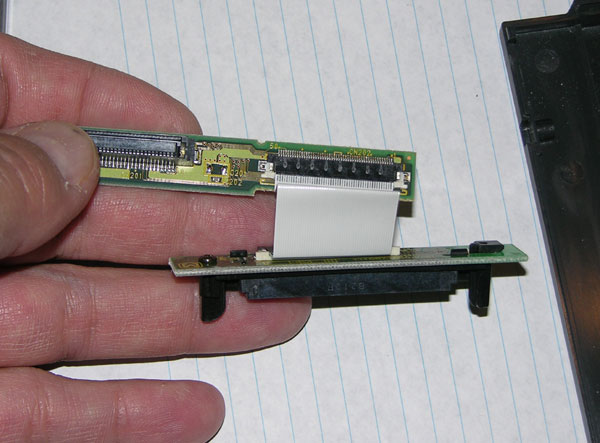
What you need to do next is to solder the two little dots of solder together in the box labeled R2. (Below)
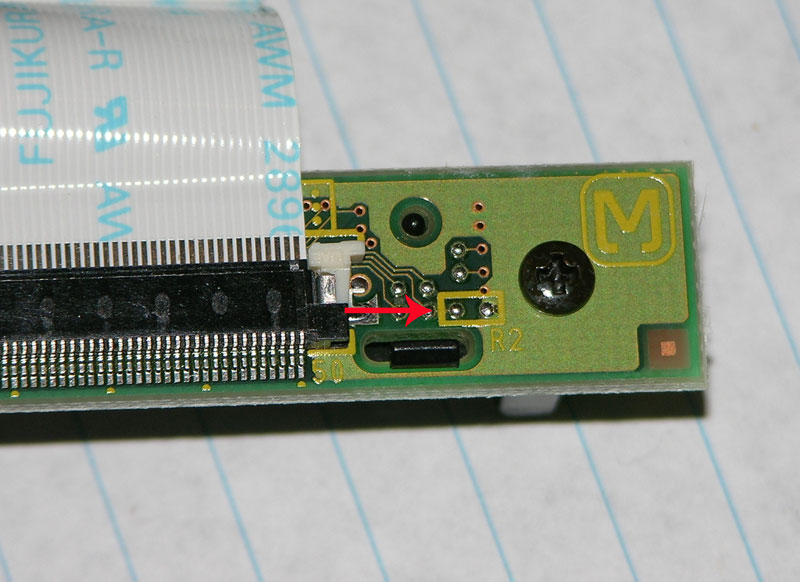
Make sure that you have your soldering iron plugged in at this point
and that the tip is clean. The iron obviously needs to be hot. You can
solder these two points in one of two ways. You can try to bridge the
gap with a blob of solder or you can string a tiny little piece of
copper wire between the two points. This will allow the solder to
“flow” along the wire and bridge the gap. This is what I am showing
below. As you can see… It is lightly clamped in my vise. (If you are a
purist you can use a small SMD 000 resistor... But the results will be
the same!)
In either event you don't want to hold the soldering iron too long on
the PC board. The last thing you want os to heat the board up too much
and destroy it.
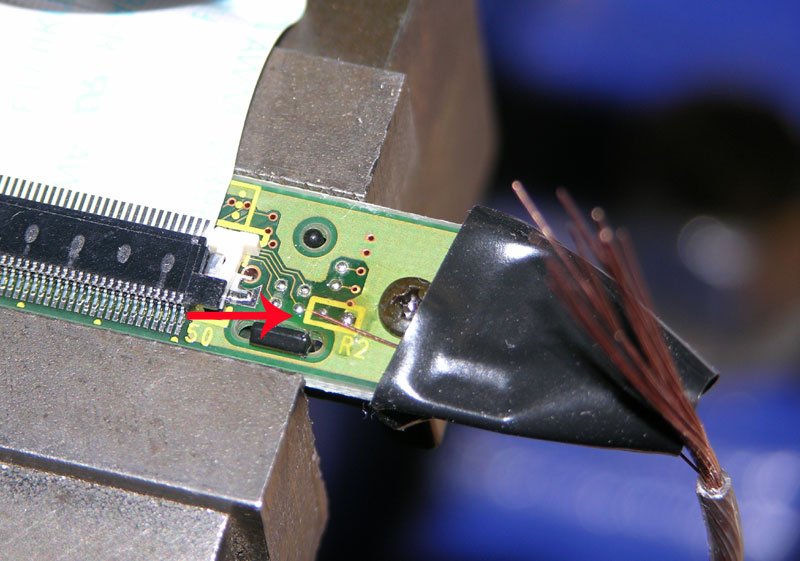
It is VERY important that the wire stay
INSIDE the yellow box! You don’t want to solder ANYTHING ELSE other than the two solder points in the box, R2.
Once the soldering has been done you can snip off the excess and you will have this! (Below)
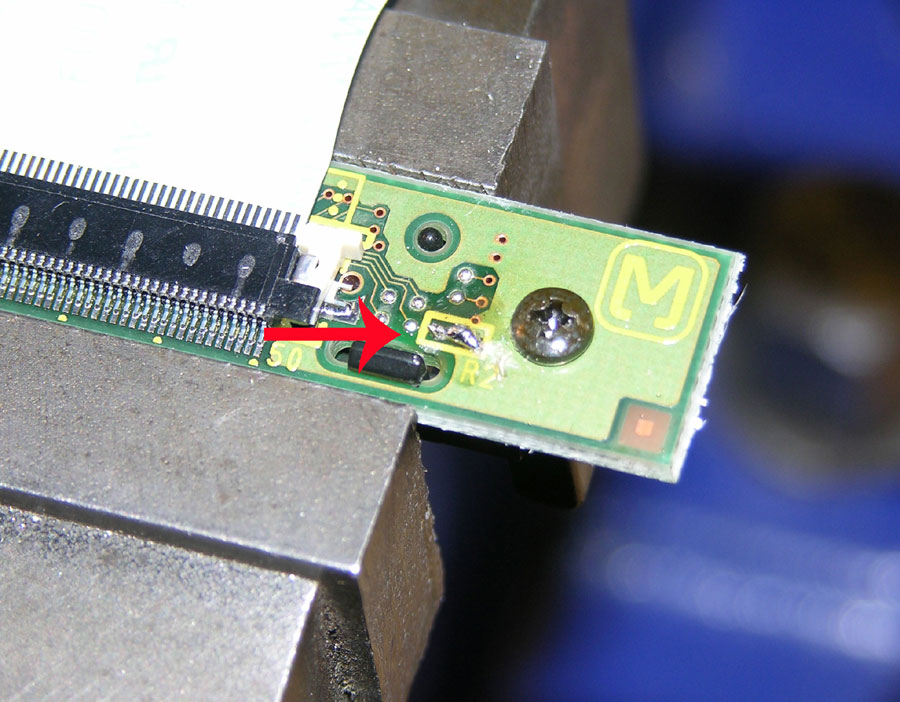
You have now finished the “hack” and need to start putting it all back
together. You can start by laying the PC board back in the slot from
where it came. Make sure you have the connector on the left hand side
so it can snap into the back of the new DVD when reassembled.
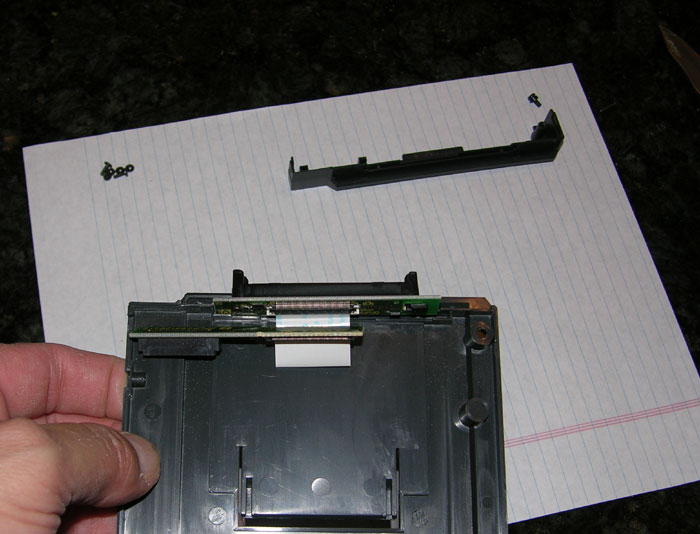
Now you need to put the small plastic top back on and screw in the screw to secure it.
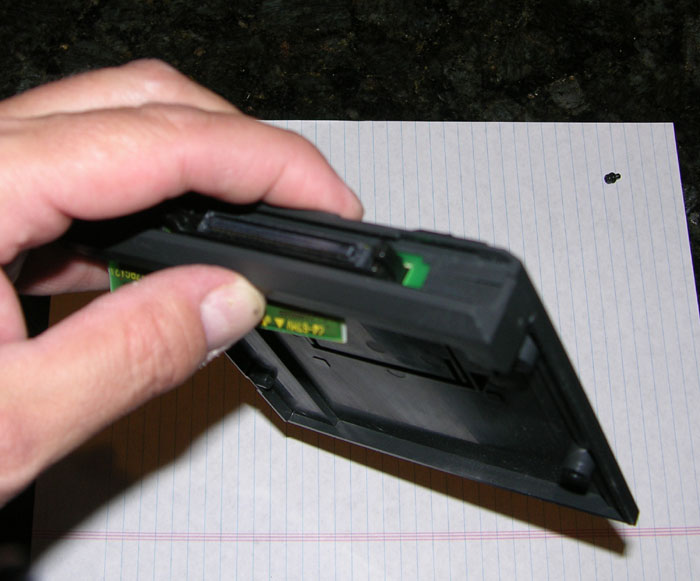
The next thing you need to do is to remove the side carrier plate from
the old CD. It is secured by two screws. (Marked with red arrows below)
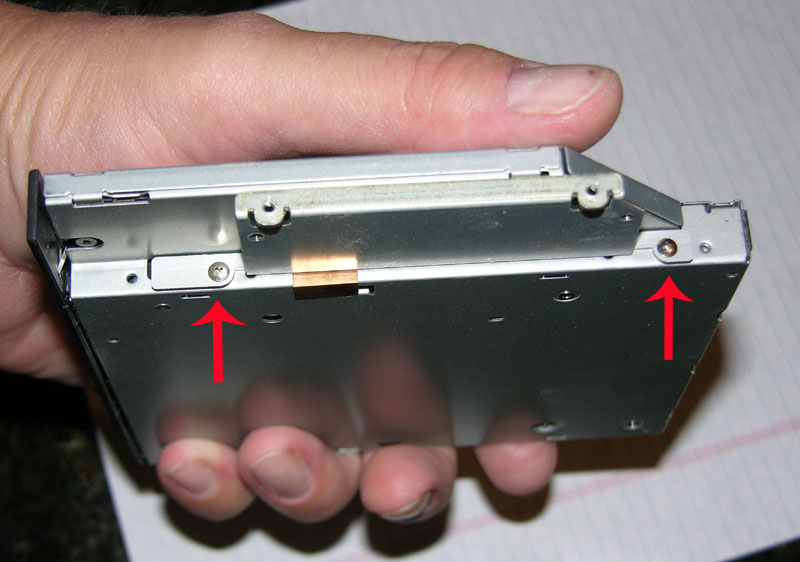
It is VERY important that you apply a firm pressure to these screws
when backing them out of the side of the CD player. You do not want to
strip them out. It is also VERY important that you have the correct
size mini phillips head screwdriver. You may be able to get by with a
good set of jeweler’s screwdrivers… But it is the firm pressure that
you need to back the screws out. When that is done… Install it on the
new DVD R/W! DO NOT OVER TIGHTEN THE SCREWS WHEN REINSTALLING THE SIDE
CARRIER!(Below)
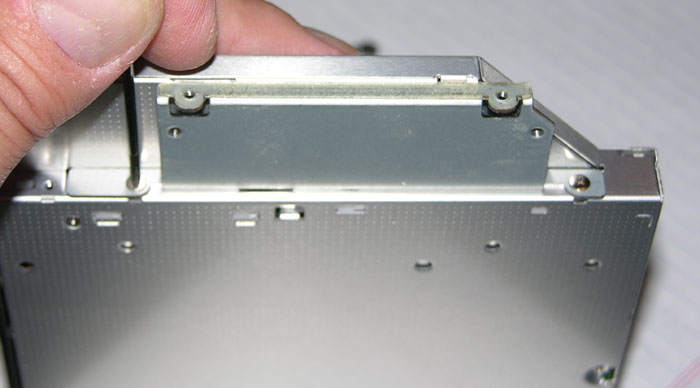
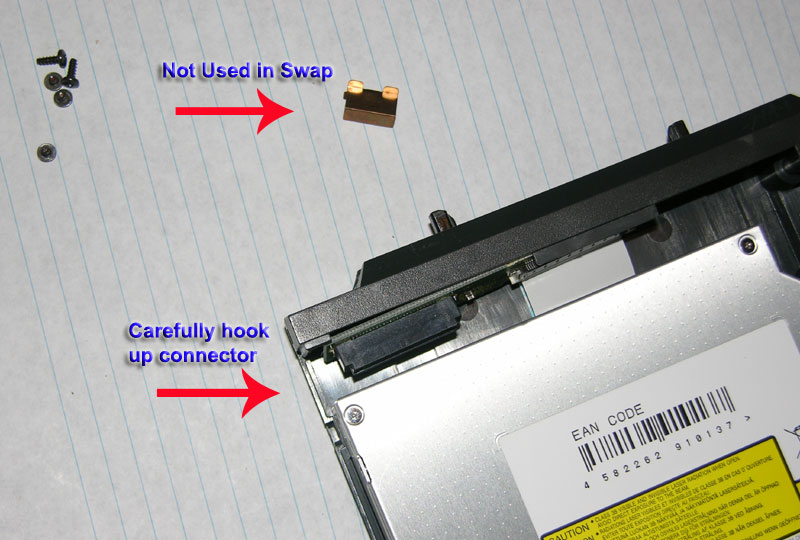
You’ll notice that the small copper piece is not used in the swap. The
new DVD R/W does not have the required hole in it for it to fit. And it
is not needed in the first place! It is time for you start to put the
DVD R/W back into the case. You may need to pull out the connector a
little in order to snap it into the back of the DVD. This is okay.
There is a little wiggle room for you to do this. But you MUST make
sure that it is properly aligned! It should fit with just a little bit
of pressure. You should NOT have to force it into place. (Below)
After snapping the connector in the back of the DVD all you need to do
is to carefully fit the cover back on top. Reinstall the cover by
screwing in the 6 screws of the outer case. Now… Put it in the media
bay and boot up the laptop and… BEHOLD!
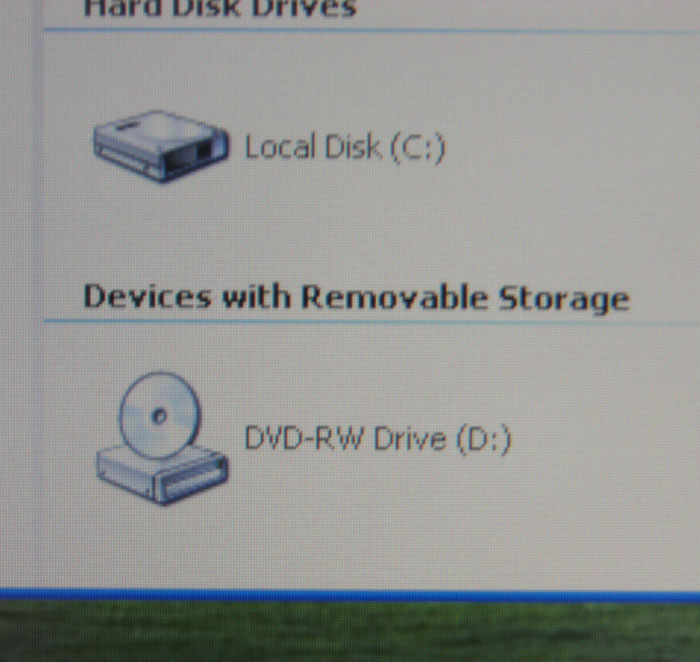
You can now see that you have a DVD R/W in your updated Panasonic Toughbook!
By the way... Something I must add... When you swap the drive... Make
sure you run some electrical tape along the back of the DVD beside the
connector. If you look at the drive you take out... You will see what I
mean.
This project has now just saved you about $150.00
This “how-to” was written by Rick Kirby – Pasadena, MD
** I take no responsibility for anyone messing up their CD-DVD drive
because of incompetance, lack of motor skills, or basic stupidity on
the part of the person attempting this. This is a very easy
"First-timer's" hack and not much really can go wrong.**